Improperly Nailed Shingles
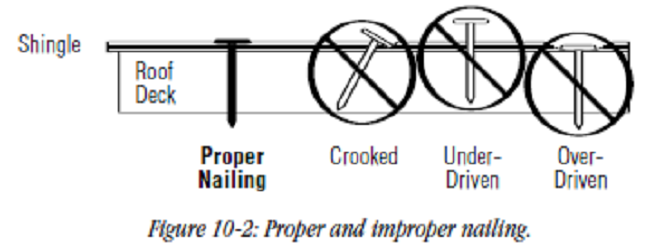
Improperly nailed shingles: manufacturers provide specific directions about how each type of shingle is to be installed, including the number of nails and where they should be placed. For example, installation instructions might specify only zinc-coated steel or aluminum, 10-12 gauge, barbed, or smooth shank roofing nails with heads 3/8" to 7/16" in diameter. Fasteners should be long enough to penetrate at least 3/4" into wood decks or just through the plywood decks. Fasteners must be driven flush with the surface of the shingle. Overdriving will damage the shingle. Raised fasteners will interfere with the sealing of the shingles and can back out.
Failure of Sealing Strips on Backs of Shingles
Most shingles have a self-sealing adhesive/glue strip on the back covered by a cellophane strip. According to most manufacturers, it is NOT necessary to remove the cellophane strip before, during or after installation. The cellophane strip prevents shingles from sticking to each other during packing, shipping and storage. It also keeps the glue from becoming contaminated from dirt, debris and sawdust, which could prevent the glue from adhering properly. After the roof is installed, sunlight and heat will activate the glue through the strip and adhere it to the shingle below. In Upstate SC, exposure to a few weeks of normal sunlight will cause the glue tabs to activate and adhere to the surface below. However, it is not uncommon for shingle blowoff to occur on a recently installed roof, simply because the adhesive tabs haven't had time (or enough sunlight) to activate and adhere.
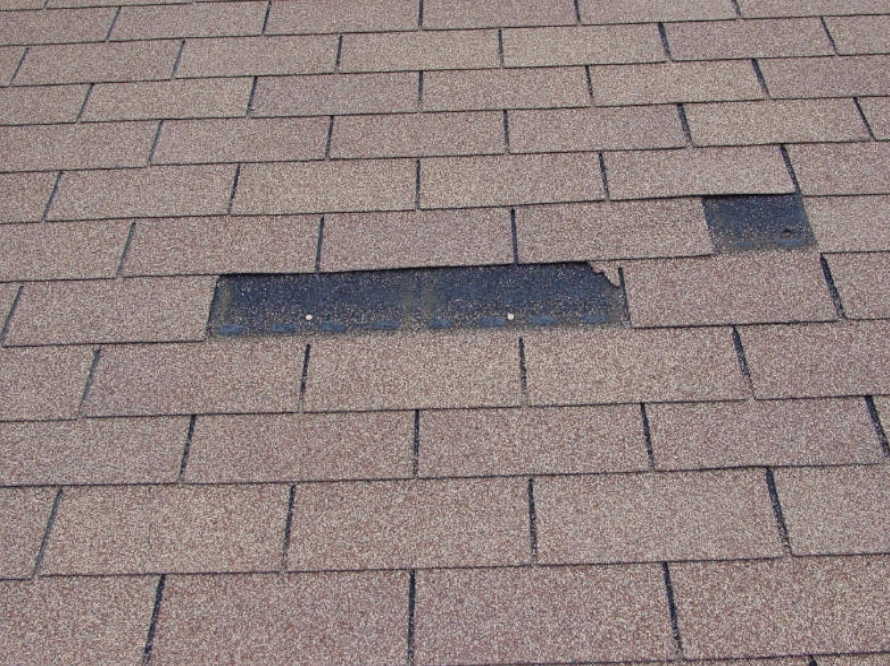
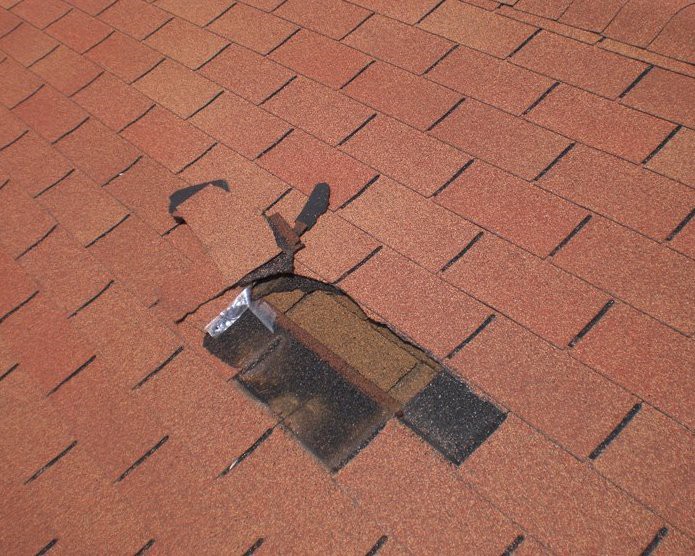
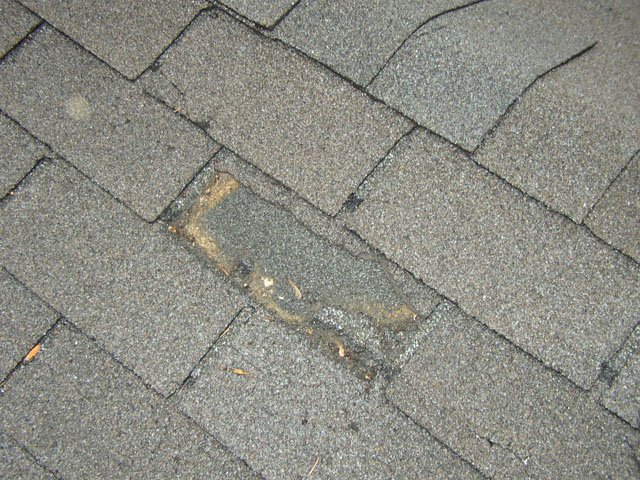
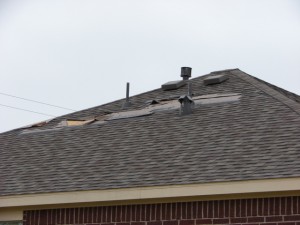
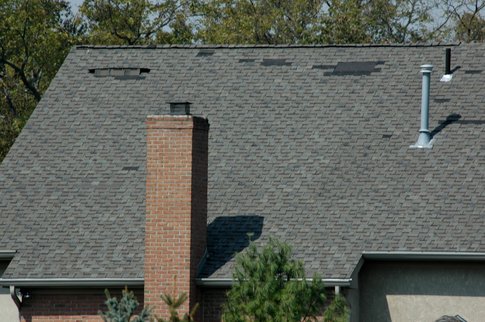
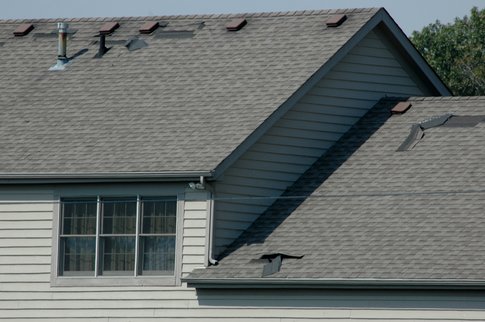
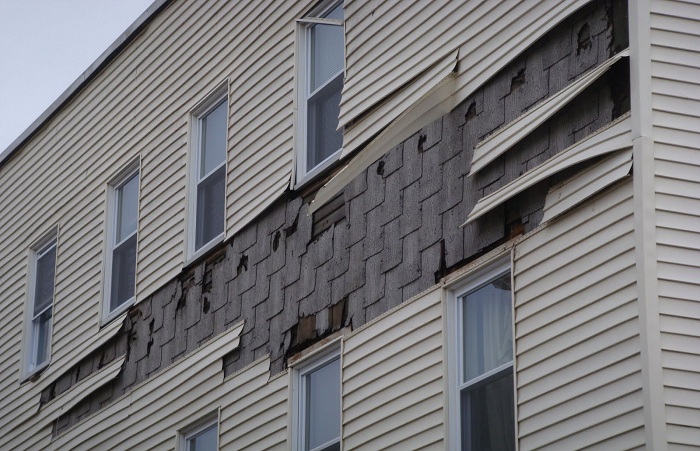
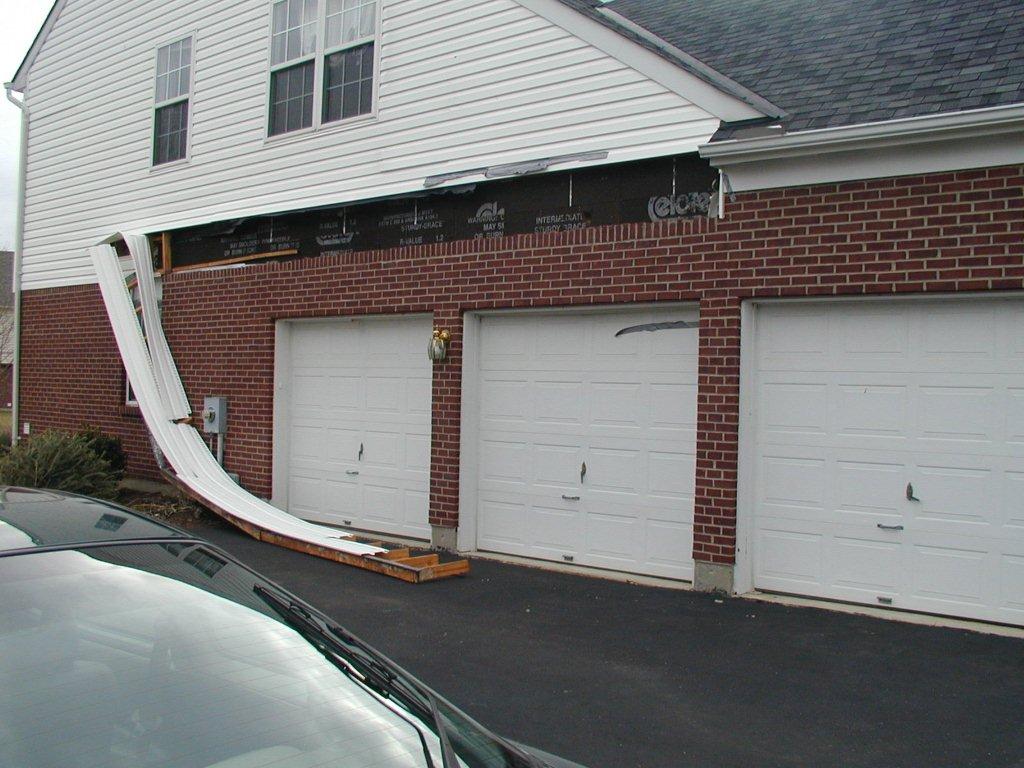
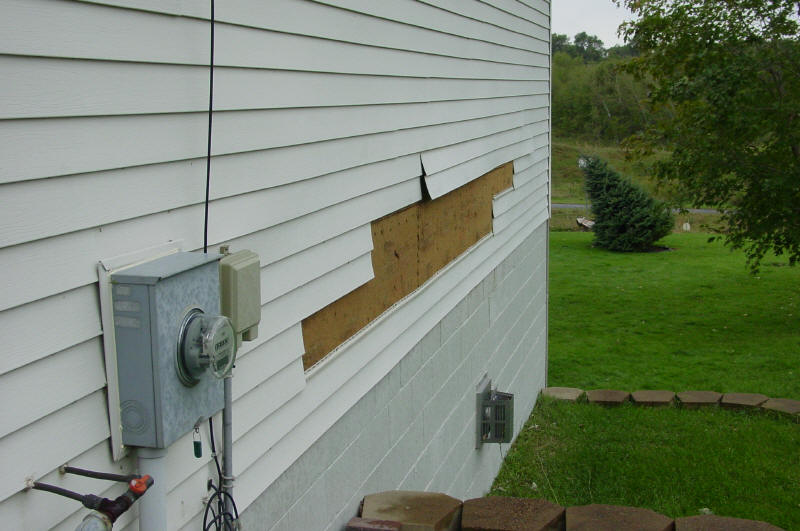
Missing or blown-off shingles are easy to spot, and we've included some wind damage photos below.
If you think you've got shingle damage from a wind storm, use this checklist as a guide and then consider having a professional examine your roof. If you think you've got hail damage, see the hail damage checklist. Most reputable companies do not charge for estimates.
Wind Damage Photos
Wind Damage Checklist
— First of all, we recommend that you don't climb on the roof. Leave that to a professional.
— Look for the obvious signs of blown-off, torn, or curled shingles.
— Are gutters dented or damaged from fallen limbs?
— Are there any tears in your window screens?
— Cracks in the windows, or visible damage to caulking or beading around the windowpanes?
— Check your HVAC unit for dents dents from falling tree limbs, debris, etc..
— Is there any broken glass inside the house? Make a note of where it is located.
— Is there any damage to lawn furniture or outside decorations?
— Any damage to porch screens, hot tub covers, etc.?
— Inspect fences, swing-sets, decks and patios for marks, dents or scuff marks.
— Do you have outside lights? Do they still work?
— Check swimming pool for floating debris or other damage. Did you have to clean out the pool?
— Check trees for broken limbs and/or fallen limbs.
— Did you lose your electricity? Did you have food spoilage?
— Look for water stains on the ceiling, particularly in corners, around light fixtures, and around the chimney.
— Check the attic for water seepage or wet insulation.
Wind Storm Damage Estimate
— An experienced roofer with a trained eye can identify wind damage that you might have missed.
— Schedule a time when you can be there for the inspection.
— Ask for feedback about the claims process; share any notes you made during your initial walk-around.
— Get a detailed, written estimate for everything. We provide free estimates with no sales pressure.
— Ask for proof of licensing and liability insurance (we carry $2 million, more than most companies).
— Our SC Roofer's License license number is 51518.
— Verify the name and address of the business.
— Ask for references. You can some of our customer testimonials at the bottom of our homepage. We can also provide you with phone numbers so that you can talk to many of our customers directly.
How To File Your Wind Damage Insurance Claim
— Call your insurance company to report the claim.
— Explain all aspects of the damage by referring to your notes.
— If other homes in your neighborhood are already having roof work done, be sure to mention that.
— Keep detailed notes of whom you talk to, including dates and times and summaries of conversations.
— If possible, ask that the insurance company rep and roofing contractor be there at the same time.
— Let the insurance adjuster and the roofing contractor discuss the claim together.
— If some or all of your claim is denied, you may be able to appeal. Ask your roofer if he can assist.
— If your claim is accepted, clarify when you will receive payment.
— Some insurance companies do not release full payment until all repairs are complete.
— If you have a mortgage, the check might be written jointly to you and your mortgage company.
— Check with your mortgage company to see whether additional paperwork is needed on their end.
When It's Time For the Roof To Be Replaced
— Clear the driveway for materials delivery.
— Discuss with the contractor if and where any roofing trash containers will be placed during the job.
— Remove hanging pictures, and loose items from bookcases and shelves.
— Hammering and vibrations from the repair may damage these items if they are left in place.
— Make sure that the contractor has access to outside electricity for nail guns, air compressors, etc.
— If you have pets, be sure to keep them out of the way during the installation.
When The Job Is Complete
— Walk around to inspect the job. The on-site supervisor should do the walk-around with you.
— Make final payment.
— Request a copy of the manufacturer's warranty.
— Ask whether the company offers a workmanship warranty; if so, ask for a copy.
— Verify that mechanics liens have not been placed against your property.
— File all related paperwork in a safe place in case you need to refer back to it.


